Configure a new button
- From the Mode selection area within the Configuration dialog choose a mode in which your button shall appear.

- Select a Creo command from the Creo command list
- Use the Transfer button to add it to your RMB structure tree.
- The chosen command will be added below the selected item in your tree.
- The Command Properties are displayed
- All properties are filled with the original command values
- Enter a Unique command ID or keep the automatically generated ID
- Adjust the Name and Popup help text for the button in English and a 2nd language of your choice (optional)
- Keep the proposed images or select any image from the PTC Creo list or any customized picture file (16x16 pixel)
- Select the Parent menu, if not already correct
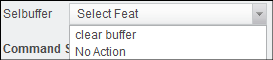
- Choose a Selbuffer from the drop-down list. View the full list in section Selbuffer content types.
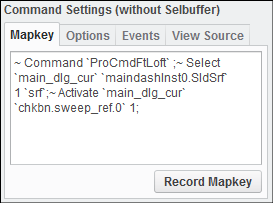
- Configure the Command settings
- Keep the original Creo command entry or extend it by entering or recording a Mapkey
- Define the button Options (optional). See also Apply config.pro Options and Use button as toggle
- Specify Events for the button (optional). See also Add events to a button
- Keep the original Creo command entry or extend it by entering or recording a Mapkey
- Click Export Translation files to update the translated text files
- Click OK to close the dialog