Applying Hatch strategies, types and properties
The SMARTXHatch dialog box offers the following functionality:
Overall hatching strategy
Before specifying hatching types and properties to components manually you may use overall strategies to work on your whole
cross-section and roughly prepare the hatching
- Select SMARTXHatch from the Tools tab in the ribbon, the Edit Hatching dashboard or the RMB when a hatching is selected.:
- The SMARTXHatch user dialog opens
- Define the overall hatching strategy that you want to use.
 Apply Rules — Applies the rules that are defined in the rules configuration file within the preview.
 — Opens the Rule Editor.
 Auto 45/135 — Alternates the hatching of all components to an angle of 45° or 135°.
 Copy — Opens the Copy Hatching dialog to copy the hatching from another view to the current view.
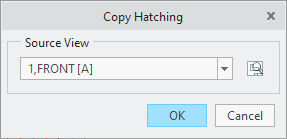
 Distribute — Opens the Distribute Hatching dialog box to distribute the selected hatchings to other views..
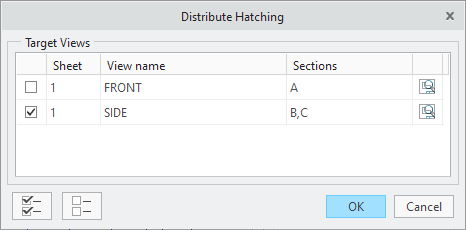
- Specify the strategy behavior by enabling one or both checkboxes from the Override section
- Manual — If enabled the usage of Apply Rules or Auto 45/135 will override manual changes.
- Rules — If enabled the usage of Auto 45/135 will override rule changes.
- Manual — If enabled the usage of
Manual specification of hatching type and properties
After the specification of an overall strategy for the hatching you may continue to detail the display of the hatching by
adjusting the type and properties manually.
- Select the component or body of a component that you want to work on. You may select multiple components or bodies using the
CTRL-Key and selct from the graphics area. Alternatively you can toggle through the components with the pervious nad next
buttons.
- Prev — Selects the previous component or body.
- Next — Selects the next component or body
- Define the Type of the hatching. Use may choose from three independent options
- Fill — Fills the selected component.
- Pattern — Uses a pattern for hatching
- Hatching — You can use one or two hatch property sets
- Define the Properties of the selected hatch type
- Fill

 — Specify a color for your filled area
- Pattern
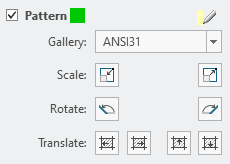
- Choose a pattern from the Gallery drop-down list

 — Scale pattern down or up.

 — Rotate pattern to 45° or 135°.


 — Translate pattern in respective direction
- — Specify a color for your filled area
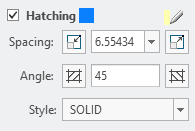
- Hatching
- — Decrease or increase the Spacing incrementally or by any entered value.

 — Set hatching Angle to 45°, to 135° or any entered value.
- Style — Select a line style for the selected component.
- — Specify a color for your filled area
- Offset — Define the offset to the first hatching.
- Fill
- Finalize your settings
 Hatch — Set the currently defined hatching properties to the component or restore the hatching if it was erased or excluded.
- Exclude from section: The component will be excluded from the hatching.