To Write BOM to Excel via Macro
In most cases a formatted EXCEL-file for the BOM is needed. This chapter explains how to set up a special Macro for EXCEL.
The EMX BOM content can be imported automatically to an EXCEL-template.
Use the template emx_bom.xls
The setting of the option BOM_FILENAME drives the output format of the button Copy content to windows clipboard  .
.
.
- Set the EMX Option BOM_FILENAME to C:\TMP\buw_excel.txt It is important to use an absolute file path in this case. With this setting, the Export to EXCEL-command will create two files in C:\TMP.
- Make sure the folder C:\TMP exists.
- Export the BOM with .buw_project_excel.txt has five lines with the first five Project Parameters defined in EMX Options.buw_excel.txt is a listing of all components in the BOM with their parameters &pos_id, &partid, &qty, &bomname, &supplier, &ord_number, &material, &remark, &special and &dwg_page.After exporting these two files EMX will open EXCEL automatically using the template /configuration/templates/emx_bom.xls. This EXCEL-file has an Import Macro that will be started automatically when the file opens. Due to the fix content of the two export files, the macro can import and resort the parameters into the correct sheets (Blatt 1–Blatt 3) of the template.
Use the template emx_bom_adv.xls
While the method mentioned above can only handle certain parameters, EMX offers a more flexible way to define the content
of the EXCEL-template.
- Set the EMX Option BOM_FILENAME to C:\TMP\emx_bom_adv.txt to use this more flexible template configuration/templates/emx_bom_adv.xls.
- Open the EXCEL template <emx_install>\configuration\templates\emx_bom_adv.xls.Before using the xls-file, you need to configure the column names and (optional) the substructure.Check if the Source File Name is equal to the previously set EMX Option BOM_FILENAME, in this case C:\TMP\emx_bom_adv.txt.

- In row number 2 (EMX_PARAMETER_NAMES) add the exact parameter names used in EMX Options. In row number 3 (CUSTOMER_COLUMN_NAMES) add the according column names used in the BOM sheet.In this example six EMX parameters are used: MODEL, POS, QTY, BOM_NAME, SUPPLIER, MATERIAL.
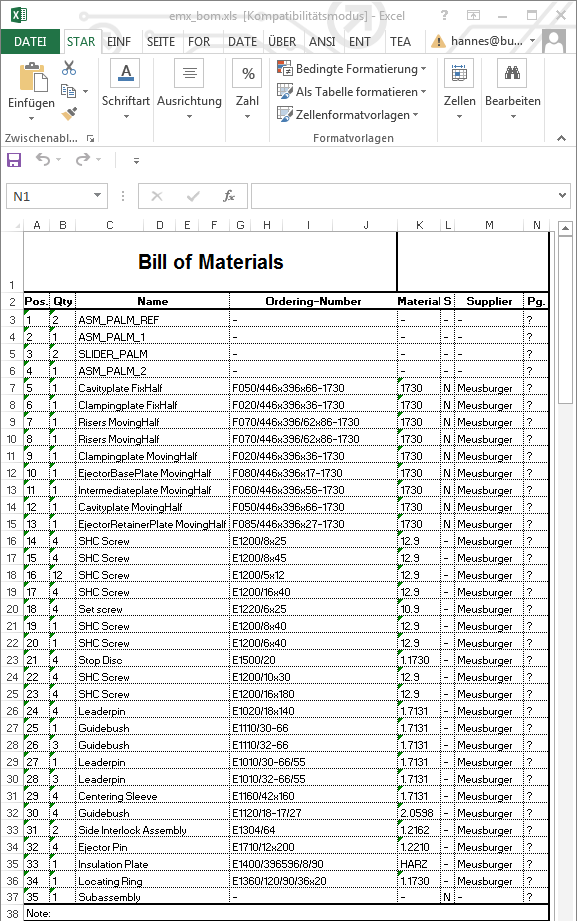
 In the BOM sheet of the columns look like this:
 In the System sheet of the excel the parameters need to be set up accordingly:
- It is possible to add extra comment lines in the BOM. Add the desired group titles in row 9 (GROUP_TITLE). It is possible to set up as much comments as you want. In the row underneath (STARTING_POS_NR) a position id needs to be defined which describes the starting positionSet up four titles as shown below and make sure GROUP_MODELS option is set to YES in row 6.

- Save the emx_bom_adv.xls and close EXCEL.
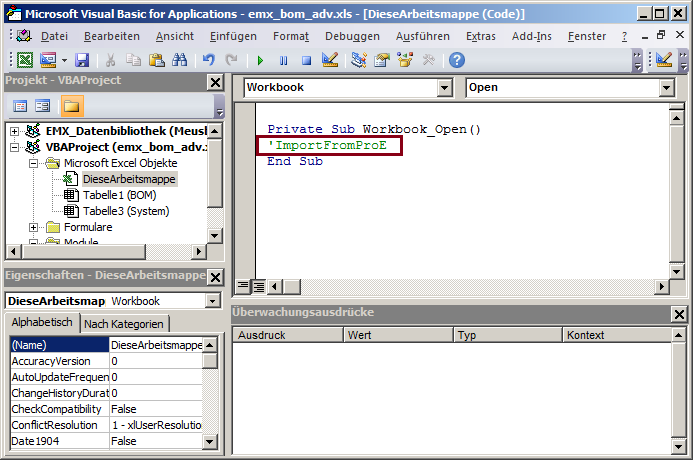
- Go back to Creo and export the BOM with . In case macros in Excel are deactivated activate content.
- Run the Import of EMX Parameters with Developer Tools Macro
 ImportFromProE.
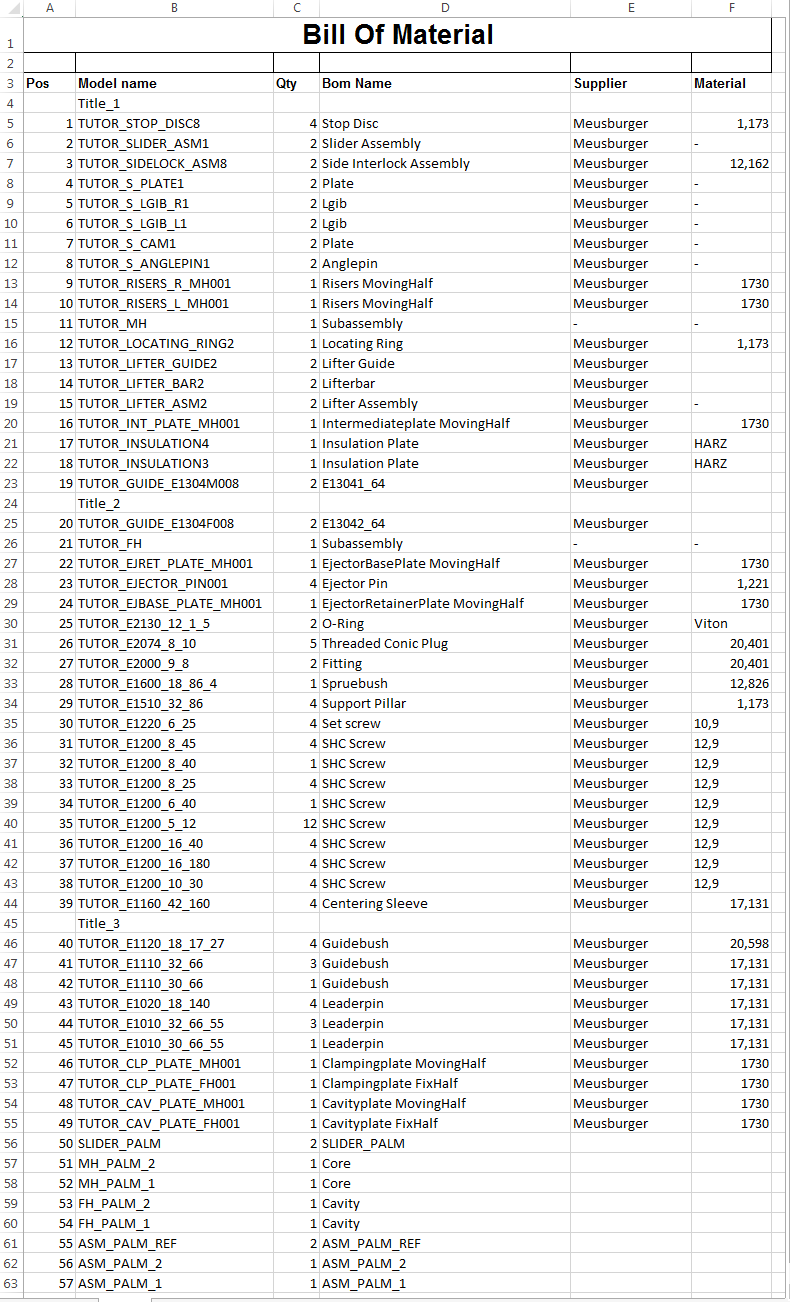
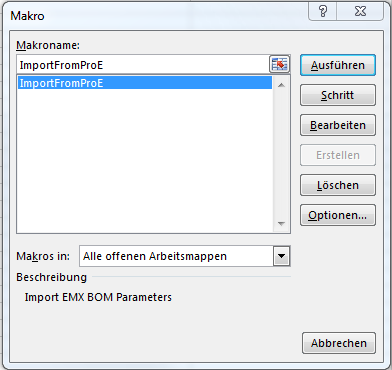 A new EXCEL file will be created named emx_bom_adv_output.xls and written to the current working directory.
If you want the Import Macro run automatically when open the file, uncomment this line ImportFromProE in the Visual Basic Macro.